Gluten Free Sourdough Bread
This recipe teaches you how to make delicious, crusty gluten-free sourdough bread! It makes one boule that’s crusty on the outside and tender on the inside. It can be made in one day or overnight and uses a nutritious blend of gluten-free flours, starches, flax, and psyllium – no xanthan gum. This post contains affiliate links, which means I may earn a commission when you shop through them.

It was at the height of my sourdough baking era that my doctor recommended I stop eating gluten. While I still make traditional sourdough and other baked goods with wheat flour with and for my family and friends, I have also learned to bake gluten-free.
After testing many, many gluten-free sourdough bread recipes, I’ve landed on this one as my favorite. Even if we can’t eat gluten, we can still enjoy sandwiches, avocado toast, and more! Keep reading for the detailed step-by-step recipe with lots of photos to master your artisan boule at home.

Is Sourdough Gluten-Free?
Due to its fermentation, many people tolerate sourdough bread better than others, but traditional sourdough bread is not gluten-free. However, with this recipe made with alternative flours and starches, you can enjoy sourdough bread even on a gluten-free diet.
Why You’ll Love This Recipe
- It’s ready in one day, with a very quick ferment time of about one hour
- No xanatham gum or ultra-processed ingredients
- Made with nutrient-dense ingredients like gluten-free oat flour, psyllium husks, and flax
- Crunchy crust with a light and airy crumb
- Perfectly slicable for sandwiches and toasts

Best Flours for Gluten-Free Sourdough Bread
The trick to making gluten-free bread similar to wheat sourdough is using a combination of flours and starches. There are several 1:1 gluten-free flour blends intended for baking available. These are convenient, but after testing many gluten-free sourdough bread recipes, I found that the blend used in this recipe creates the best results. Additionally, making your own blend of flours and starches can result in a more nutrient-dense bread that doesn’t have any added gums. I have linked the exact gluten-free flours and starches I use for this recipe below in the recipe card. Using finely ground ingredients is key. This is not the time to make your own oat flour in a blender.

How to Make Gluten-Free Sourdough Bread
The process for making this boule is not quite the same as my go-to traditional recipe. However, like any sourdough recipe, starting with a strong starter is an essential first step.
- Make a levain: A levain is a preferment made by feeding your sourdough starter with flour and water. For this recipe, you’ll make a high-hydration levain and use it when it’s at its peak (about 3-6 hours after making it).
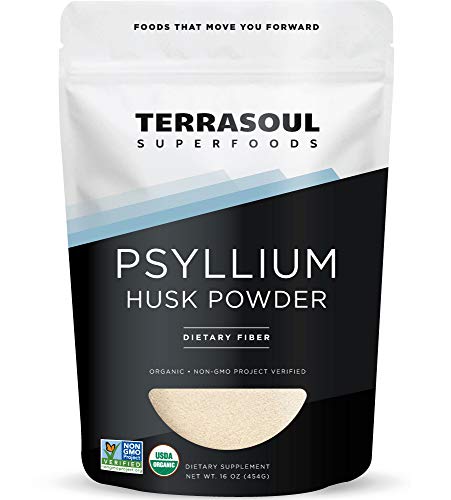
- Create a gel binder: Psyllium husk powder and flax meal make a gel that replicates the strength and elasticity of gluten without the use of gums. These are nutritious, high-fiber ingredients. We also use psyllium to make Adventure Seed Bread.
- Make the dough: Combine all the flours and starches in the bowl of a mixer and add the proofed levain and psyllium gel mixture. I weigh them all right in one bowl.
- Proof: This dough only needs to proof for one to two hours. In my warm kitchen (75-80 degrees F), one hour is perfect. It might take a couple of attempts before you get the timing just right in your kitchen.
- Bake: This boule is baked just like any sourdough – in a Dutch oven with the top on and off.
- Cool completely: Let the boule cool to room temperature to allow the structure to set up.
How the Process Varies from Traditional Sourdough
If you started out making traditional wheat flour sourdough bread like I did, you might be surprised by the process of making gluten-free bread. Here are some key differences you may notice:
- There is no need for stretch-and-folds. This step of sourdough bread making develops the gluten, so there is no reason to do it with gluten-free flours.
- Your dough won’t double in size while proofing. Actually, you probably won’t notice it expanding at all!
- Oven spring is less pronounced.
- More ingredients are needed to mimic gluten’s structure.
Gluten Free Sourdough Starter
Just like traditional starter, you can get gluten-free starter from a friend, make it from scratch, or order fresh or dehydrated starter online. I’ve used one I got from a local gluten-free bakery, as well as one I made from dried starter. Gluten-free sourdough starters are typically fed with rice flour or rice and oat flour. While it will grow into a mousse-like substance, the texture is not as smooth as wheat flour sourdough starter.

Sourdough levain is made by combining starter, rice flour, and water on a kitchen scale.
Essential Equipment for Making Sourdough Bread
- Kitchen scale: If you’re used to using measuring cups, this might feel new, but using a kitchen scale is much more accurate. You can keep adding your ingredients to a bowl on the kitchen scale, zeroing it out between ingredients, making measuring quicker, easier, and less messy than measuring cups!
- Dutch Oven: The simplest way to bake sourdough that’s crusty on the outside and tender on the inside is by baking in a covered Dutch oven.
- Parchment paper: You’ll need to transfer your dough to the very hot Dutch oven, parchment paper or a silicon bread sling is the best way to do that.

Baker’s Timeline
Option 1: Same-Day Bake
- Morning (around 7 a.m.) – Mix your levain and let it ferment until puffed and bubbly.
- Midday (around 11-12 p.m.) – Mix the dough, shape it, and place it into a proofing basket.
- Noon/Early Afternoon – Proof at room temperature, then preheat your oven.
- Late Afternoon – Bake, cool completely, and enjoy with dinner.
Option 2: Overnight Cold Proof
- Evening (around 6 p.m.) – Make the levain and let it activate.
- Night (around 10 p.m.) – Mix and shape the dough, then transfer to the fridge.
- Morning (around 6 a.m.) – Bake straight from the fridge and cool before slicing.
- Late Morning (by 10 a.m.) – Bread is fully cooled and ready to enjoy.

Can I freeze Sourdough Bread?

Yes! Homemade sourdough is best enjoyed within a few days of baking it. However, you can have fresh sourdough bread anytime by freezing some of your boule. Just cut into slices, separate them with pieces of parchment paper, and freeze in a freezer-safe bag. When you’re ready to eat, you can toast it directly from the freezer.
Gluten Free Sourdough Bread
This naturally leavened gluten-free sourdough bread is made with simple, wholesome ingredients—no gums, no commercial yeast, just real food. It uses a gluten-free sourdough starter, whole grain flours, and a psyllium husk gel to create a beautifully crusty loaf with a moist, airy crumb. This recipe makes one boule and can be baked the same day or cold-proofed overnight for added flexibility. Perfect for slicing into hearty sandwiches or toasting with your favorite toppings.

Ingredients
Levain
- 123 grams sourdough starter
- 110 grams lukewarm filtered water
- 80 grams superfine white or brown rice flour
Psyllium Gel
- 350 grams lukewarm filtered water
- 20 grams psyllium husk powder
- 10 grams flaxseed meal
Dough
- 105 grams gluten-free out flour
- 60 grams sorghum flour
- 60 grams tapioca starch
- 60 grams potato starch
- 6 grams fine sea salt
Instructions
- Build the Levain. In a larger jar or medium bowl, stir together the sourdough starter, lukewarm water, and rice flour until fully combined. Cover with a clean towel and let it sit at room temperature for 3 to 6 hours. When the levain is ready, it should look puffed up, full of bubbles, and have a mousse-like texture.

- Mix the Psyllium Gel. Whisk the water, psyllium husk powder, and flaxseed meal in a medium bowl. The mixture will quickly thicken into a gel-like consistency. Set it aside until you’re ready to mix the dough.
- Prepare the Dough. Add the oat flour, sorghum flour, tapioca starch, potato starch, and sea salt to the bowl of a stand mixer fitted with a dough hook. Whisk to combine. Add the psyllium gel and the entire levain.
- Mix on medium speed for about 3 minutes, or until everything is evenly incorporated and a cohesive dough forms. (You can also mix by hand—just be sure to stir well so there are no dry pockets.)

- Shape the Dough. Dust your work surface lightly with rice flour. Scrape the dough out of the bowl and gently knead it just a few times to bring it together. Shape the dough into a smooth round ball. The dough should feel moist and elastic and hold its shape without spreading too much.
- Proof the Loaf. Dust an 8-inch proofing basket or medium bowl with rice flour. Place the dough seam-side up into the basket and cover loosely with a towel. Let it proof at room temperature for 1 to 2 hours, or refrigerate it for 8 to 10 hours. If refrigerating, cover the banneton with plastic wrap to prevent drying. This dough doesn’t expand much during proofing, so trust the process and use your final bake to guide adjustments next time. 1 hour, 5 minutes is the ideal proof time when my kitchen is 75-80 degrees, but you may need 2 hours in a cooler kitchen.
- Preheat the oven. About 30 minutes before baking, place a 5-quart Dutch oven (with its lid) into your oven and preheat to 500°F. Let it heat for at least 20 minutes so it’s thoroughly hot.
- Score the bread.. When ready to bake, gently invert the dough onto a piece of parchment paper on your hand and set it on the counter. Lightly dust with oat flour, then score the top with a sharp blade or bread lame. The best way to score this boule is with one deep (around ¾-inch) slash off to one side and superficial cuts on the other to allow for oven spring and gentle expansion.
- Bake the boule. Gently transfer the dough on the parchment into the hot Dutch oven. Carefully place a couple of ice cubes between the bottom of the pot and the parchment paper to create steam. Cover with the lid and place in the oven.
- Bake covered for 45 minutes. Then remove the lid, reduce the temperature to 450°F, and continue baking for another 50 minutes. The crust should be deeply browned and sound hollow when tapped. When fully baked, the internal temperature should register around 210°F.
- Let It Cool Completely. Once baked, carefully lift the loaf onto a wire rack and allow it to cool completely before slicing. This is key to getting a set, airy crumb and avoiding a gummy interior. Cutting too soon can cause the loaf to collapse.


Notes
Ingredients: It is essential to use finely ground flours when making sourdough breads. This isn't the time to make your own flours in the blender.
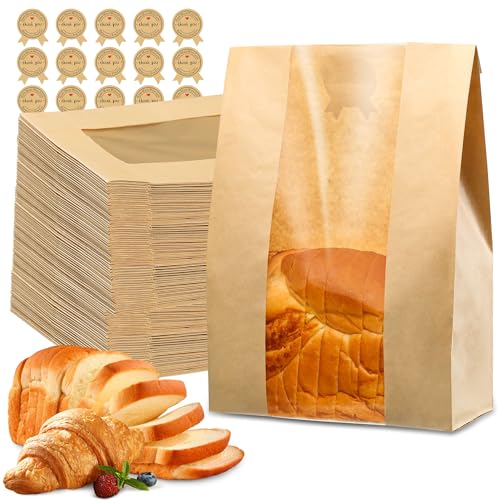
Storage: Keep the cooled bread in a brown paper bag at room temperature for up to 2 days
Psyllium: If you don't want your bread to be too brown inside, use the light psyllium husk powder I have linked, as most will create a darker bread. This one is also more finely ground, making it perfect for baking.
This recipe was inspired by/adapted from the Canelle et Vanille Simple Bakes cookbook, which I recommend for gluten-free baking.
Troubleshooting:
💡 Not Getting a Good Rise? If your loaf turns out flat or dense, check your sourdough starter. It needs to be recently fed and bubbly to provide lift. Try discarding a portion and feeding it fresh flour and water before making your levain. Also, make sure your boule is shaped tightly with the seams sealed and placed seam-side up in the proofing basket. Using a deep, narrow basket (about 8" wide) will help your loaf rise upward instead of spreading out.
⏱ Dealing with Overproofing? Gluten-free dough is more delicate than wheat-based dough, so overproofing can easily happen. If your loaf collapses or the crust pulls away from the crumb, try:
- Reducing the amount of sourdough starter (start by decreasing it by 10%)
- Shortening the fermentation time, especially in warmer environments
🍞 Gummy or Underbaked Crumb? A moist crumb is normal at first, but if it stays gummy or feels underdone, consider:
- Using only finely ground psyllium husk powder and flaxseed meal
- Avoiding coarse flours—superfine flours absorb better and bake more evenly
- Adjusting hydration: if your flour isn’t superfine, reduce water by about 10%
- Allowing a full proof—underproofed loaves will stay dense and wet
- Avoiding overproofing, which can also cause the crumb to collapse and feel sticky
🔥 Crust Too Dark or Burnt? The crust should be bold and crisp, but if it’s getting too dark on the bottom, move your Dutch oven up one rack and place a sheet of parchment paper under the dough. Also, check the color of your psyllium husk powder—darker psyllium can make your loaf appear overly brown or grey. For a lighter-colored crumb and crust, use light (blonde) psyllium husk powder.
🌬️ Cracked or Dry Crust? If you’re proofing in the fridge, make sure your dough is well-covered to prevent drying. Place the whole banneton into a plastic bag or cover with plastic wrap. Cracks can also be a sign of overproofing—try trimming the proof time slightly for the next batch.
Recommended Products
As an Amazon Associate and member of other affiliate programs, I earn from qualifying purchases.
-
 Bread Bags for Homemade Bread
 -
Le Creuset Enameled Cast Iron Signature Round Dutch Oven
-
Cuisinart KML-KO3B Precision Chef Bowl Electronic Kitchen Scale, Silver, 2.5" x 7.4" x 9.25"
-
Terrasoul Superfoods Organic Psyllium Husk Powder
-
Bob's Red Mill Gluten Free Oat Flour, 18 Oz
-
Bob's Red Mill Sorghum Flour
-
Bob's Red Mill, Potato Starch


Nutrition Information:
Yield: 10 Serving Size: 1 sliceAmount Per Serving: Calories: 163Total Fat: 1gSaturated Fat: 0gTrans Fat: 0gUnsaturated Fat: 1gCholesterol: 0mgCarbohydrates: 35gFiber: 3gSugar: 1gProtein: 4g
Nutrition information is automatically calculated by Nutritionix. I am not a nutritionist and cannot guarantee accuracy. If your health depends on nutrition information, please calculate again with your favorite calculator.