Easy Pumpkin Drawing: How to Draw a Pumpkin
Learn how to draw a pumpkin with this simple tutorial. This easy pumpkin drawing takes just a few minutes and is perfect for kids and adults to make.

Before I started creating recipes and food photography over a decade ago I was an elementary school art teacher after graduating with an education major with an art emphasis. I still love to paint and draw with my creative children – the cooking of course is an art in itself.
Friends often ask how I create my pumpkin drawings on chalkboards in my home. Today I’m sharing how to draw a pumpkin. It’s easier than you might think! Use your easy pumpkin drawing as homemade autumn decor for your home.
An easy pumpkin drawing is also a fun Thanksgiving activity for kids.

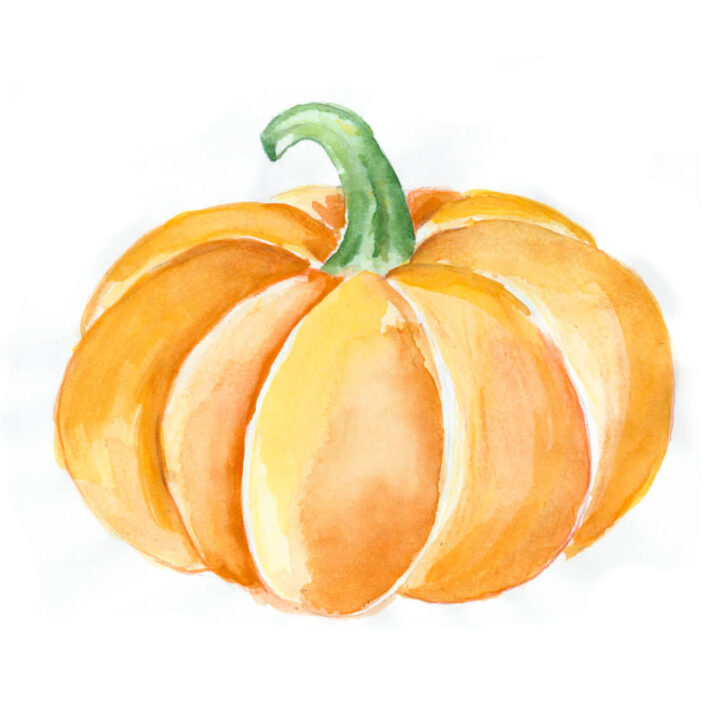
Image: Shutterstock
MATERIALS NEEDED FOR AN EASY PUMPKIN DRAWING
This easy pumpkin drawing can be completed on any type of paper or surface. You don’t need anything fancy and likely have what you need at home. If you prefer creating digital art, you can even do this easy pumpkin drawing on an iPad with an Apple Pencil.
It’s important to first decide if you’re doing to add paint or pastels, however, as that will determine the type of paper.
- Drawing paper
- Pencil
- Eraser
- Colored pencils or paint (optional)
- A fresh pumpkin for reference (optional)
HOW TO DRAW A PUMPKIN – EASY STEP-BY-STEP
You don’t need to be a confident artist to make a beautiful pumpkin drawing. Pumpkins are actually quite easy to draw as they are never perfectly shaped and each one is unique!

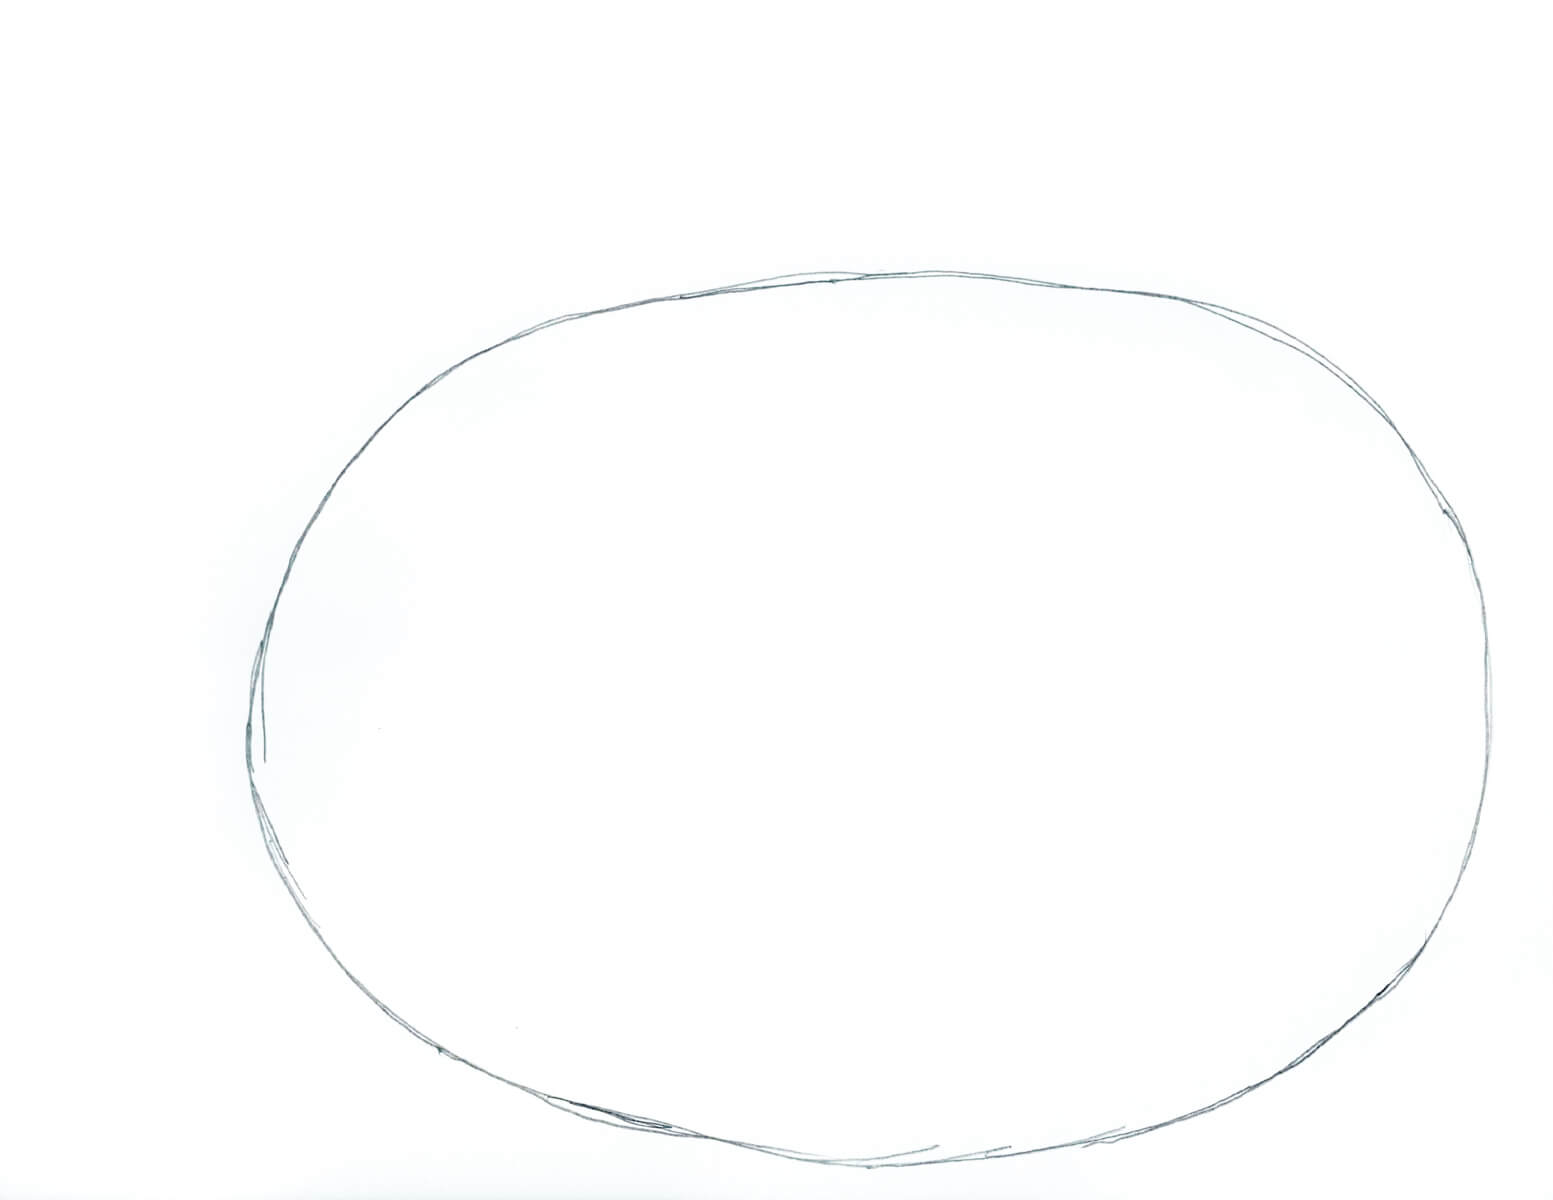
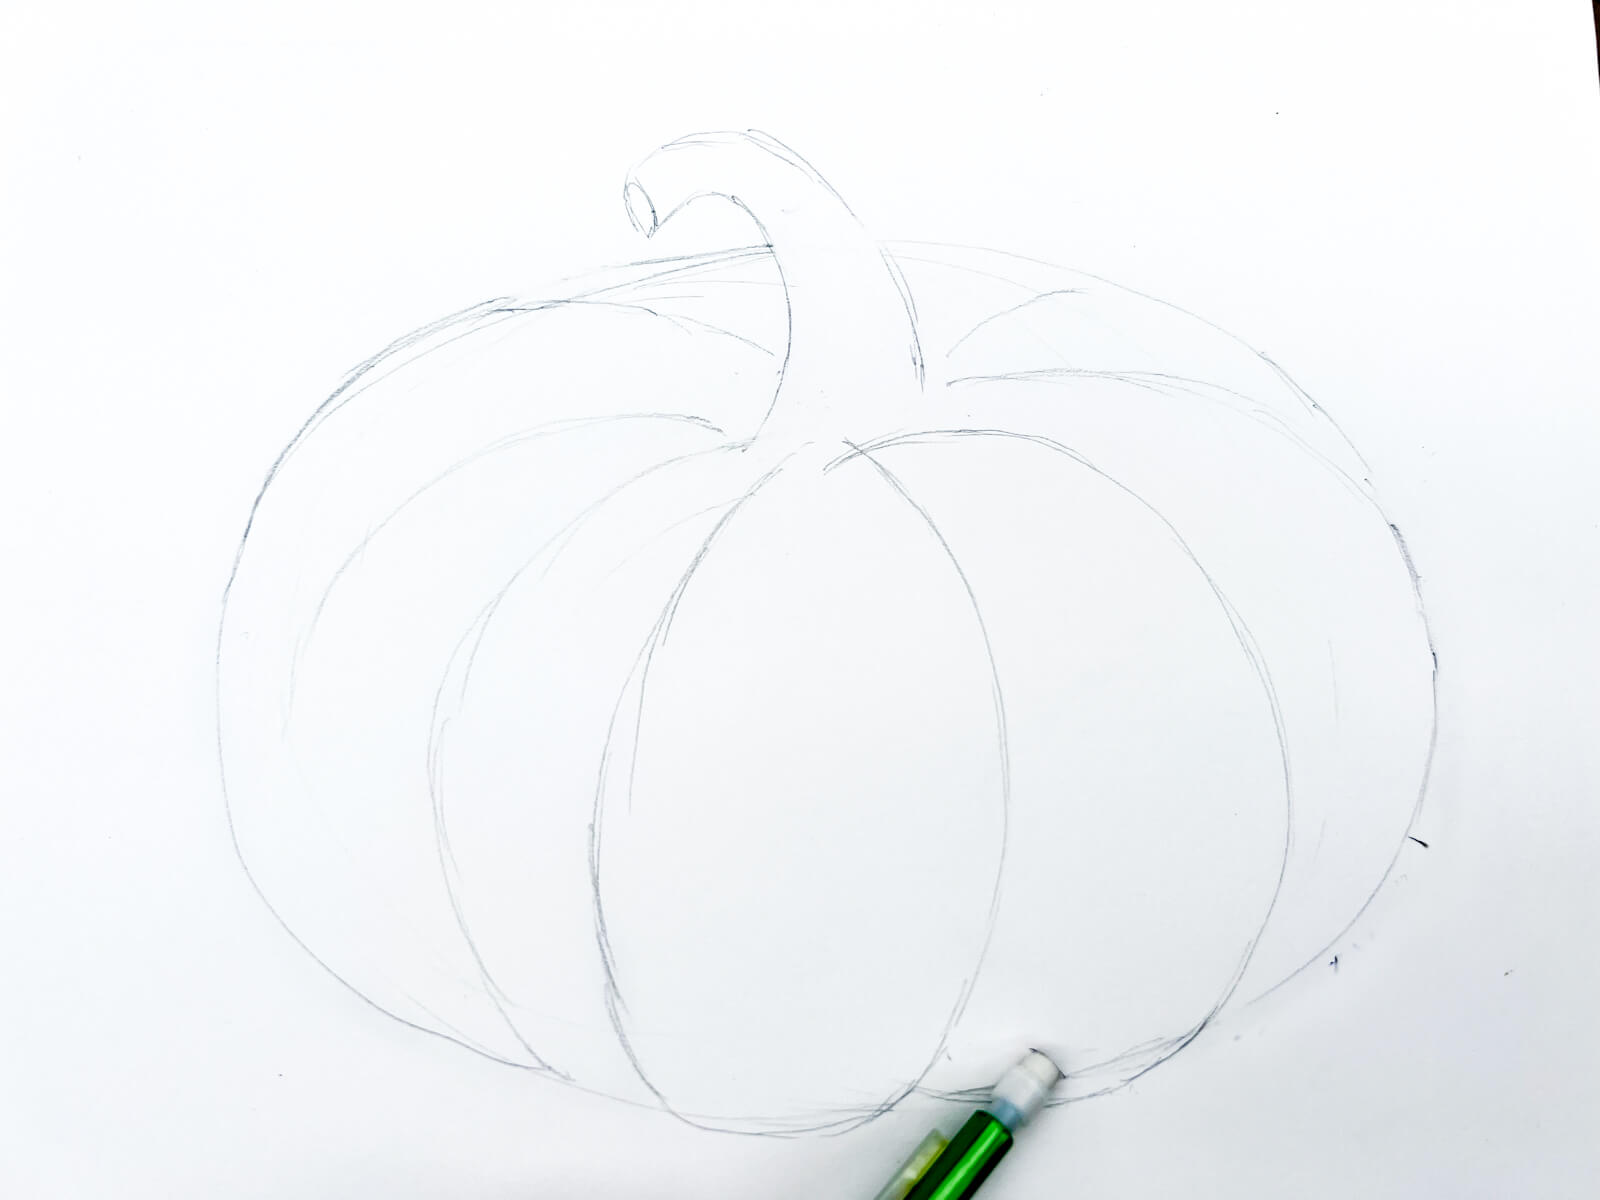
STEP 1: DRAW AN OVAL
Lightly sketch a horizontal oval on your paper. This will be the general shape of your pumpkin. Pumpkins come in all shapes and sizes, so feel free to get creative, and remember it doesn’t need to be a perfect oval.

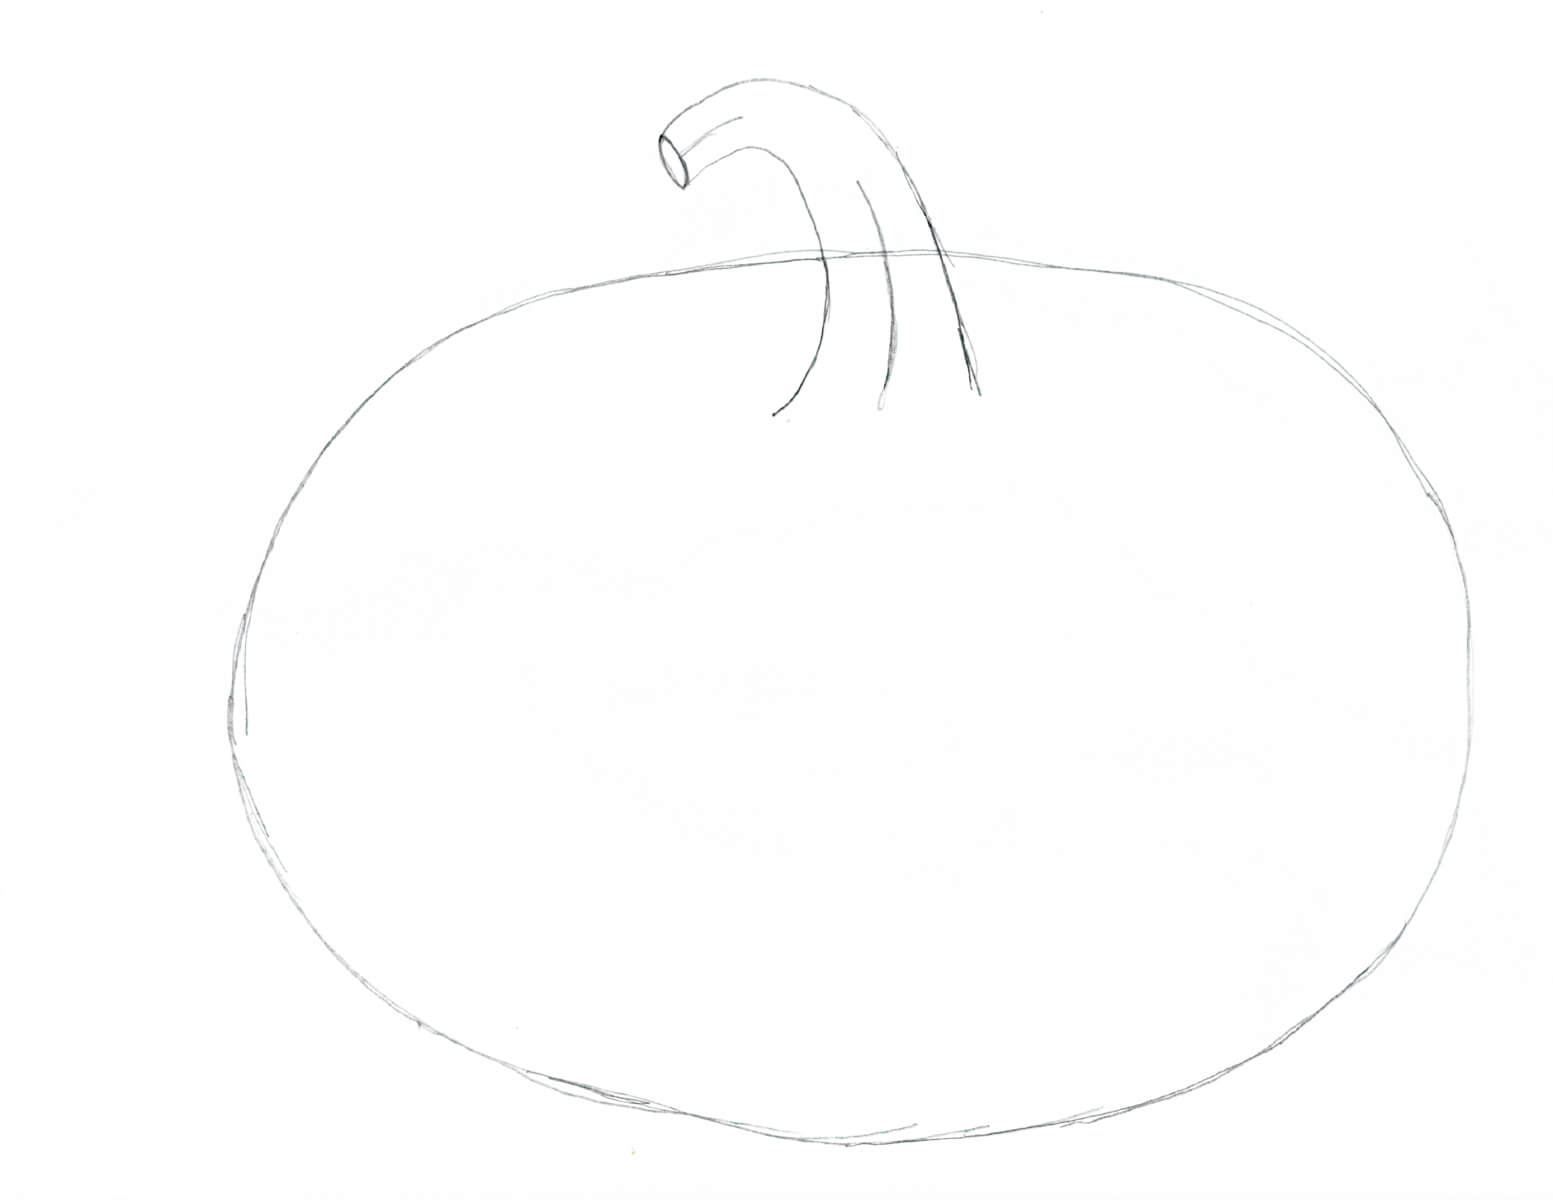
STEP 2: ADD A STEM
Lightly sketch a stem for your pumpkin. The stem can be short or tall, straight or curved. You could even add some curly vines and leaves if you’d like.
To make the pumpkin look 3-dimensional, be sure to place your stem about 1/4 of the way down the pumpkin. However, this may vary depending on the vantage point. If you were looking up at a pumpkin you would only see the top of the stem coming out of the very top of the pumpkin.

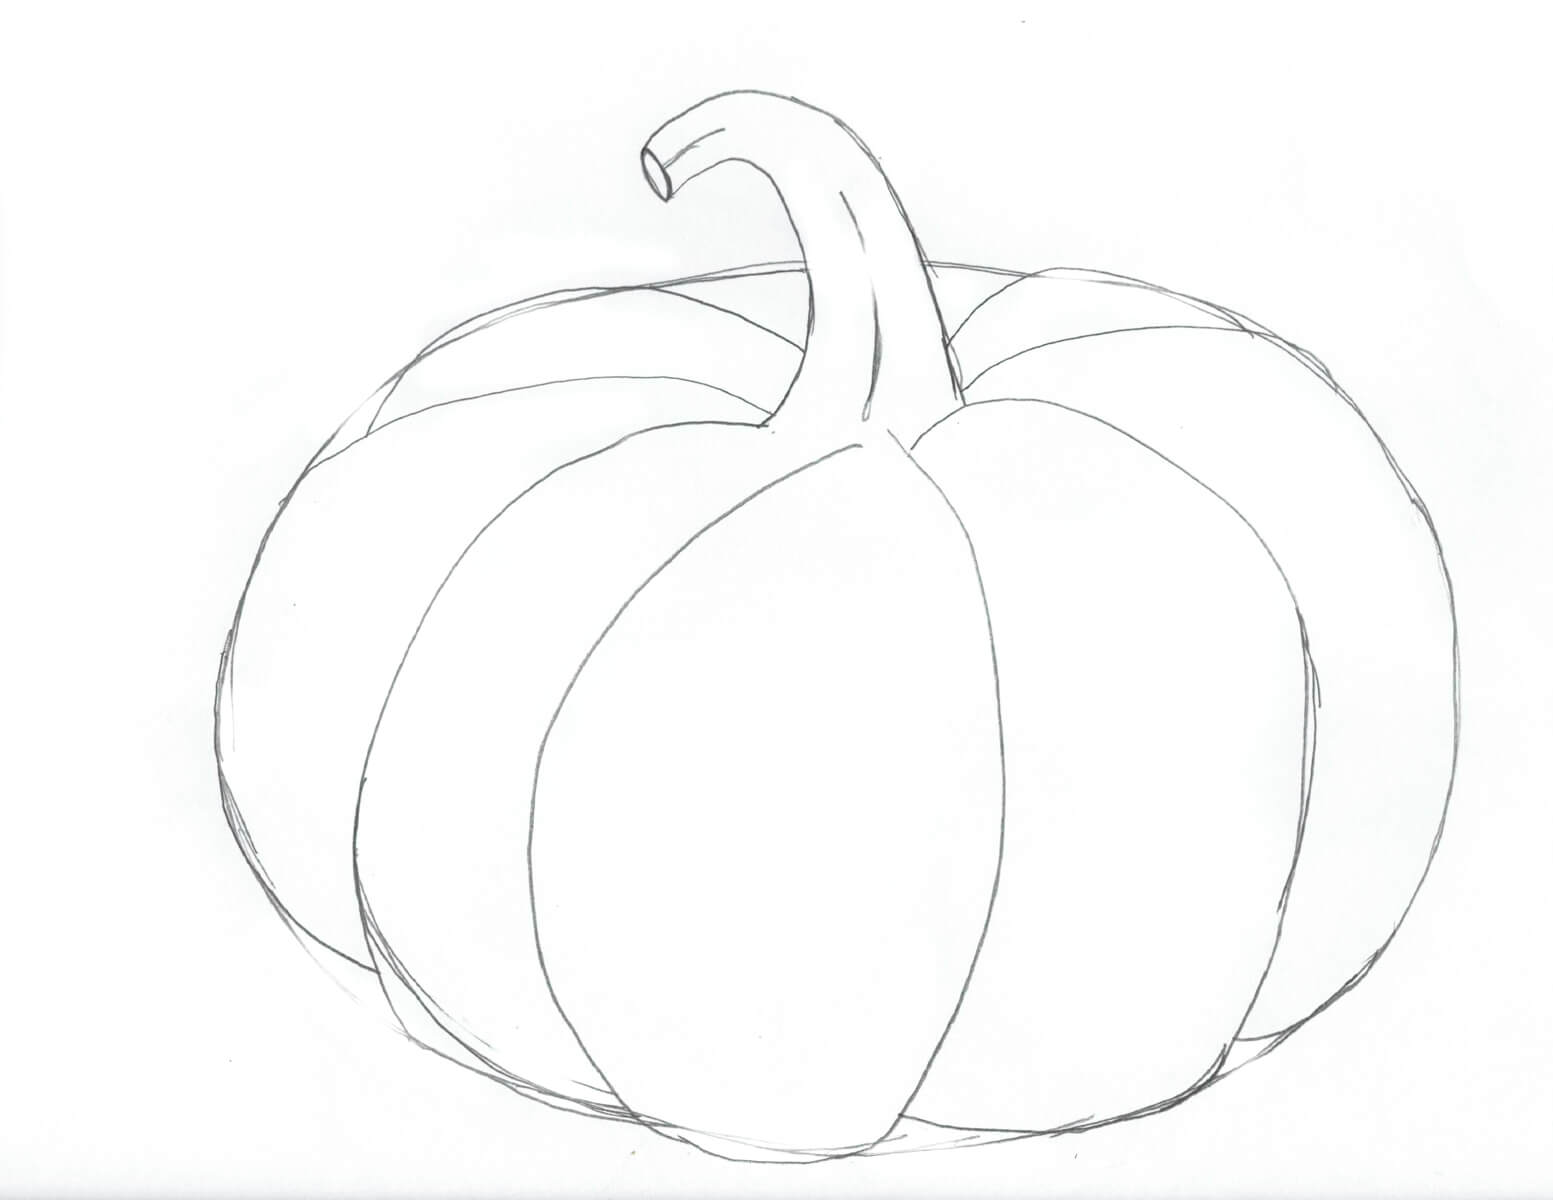
STEP 4: ADD RIDGES
Begin adding dimension to your pumpkin by drawing vertical curved lines outward from the center.

STEP 5: DEFINE THE PUMPKIN SHAPE
Continue to add dimension and shape to your pumpkin with your pencil. Use an eraser to get rid of the original oval line where needed.

STEP 6: CLEAN UP THE EDGES
Your easy pumpkin drawing is now complete! Make any changes you’d like by adding detail and erasing sketch lines. You can leave your pumpkin drawing as-is, go over it in black ink, or add color.
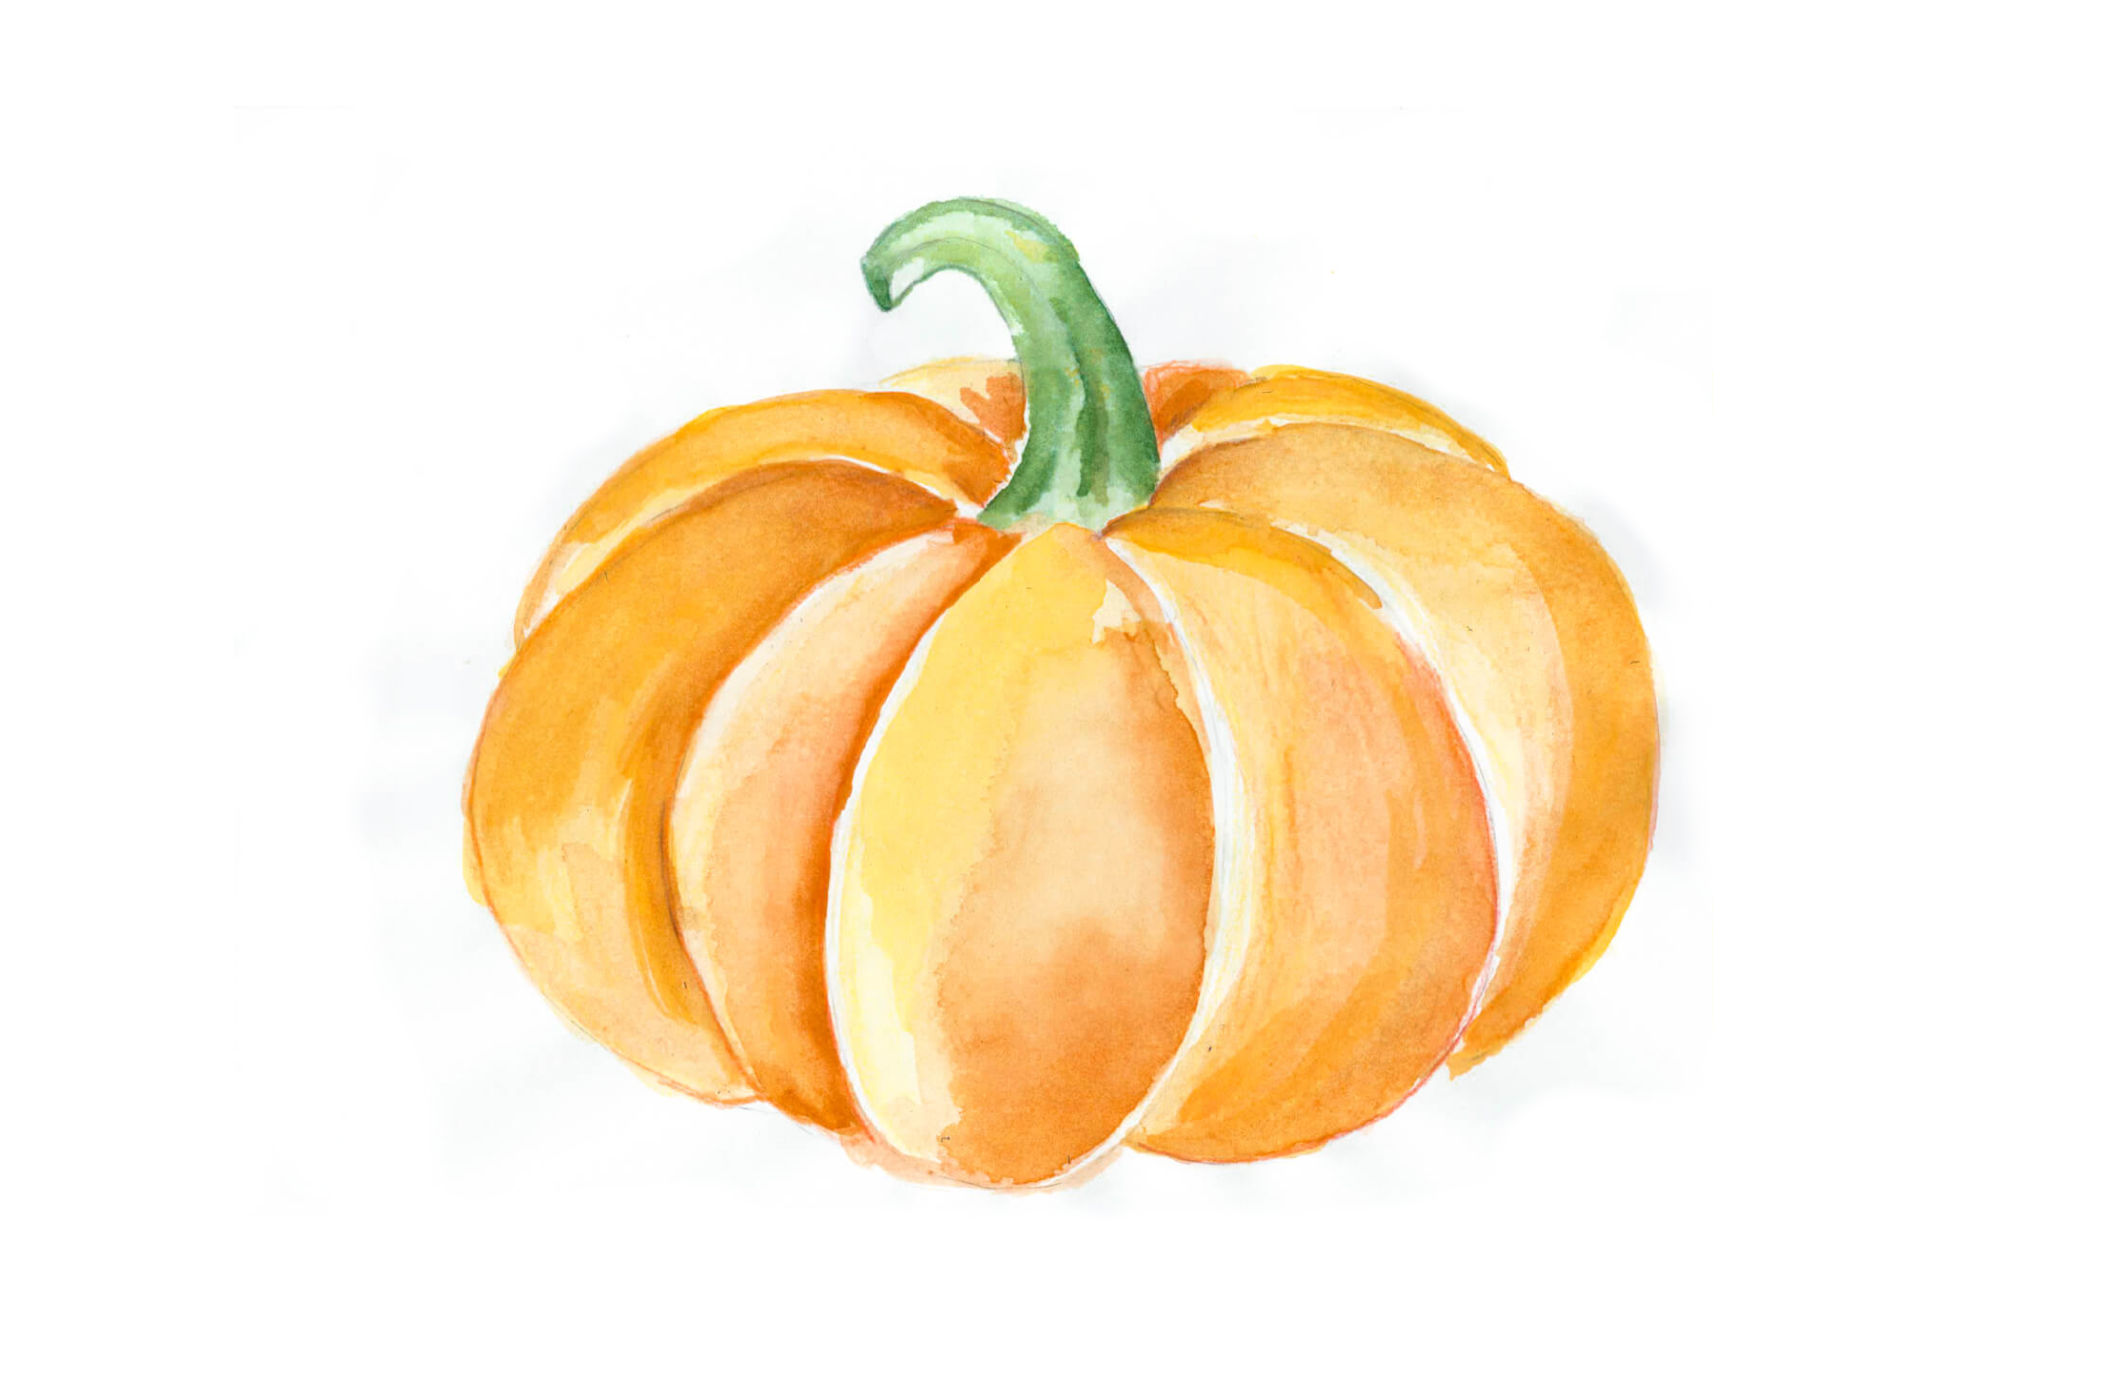
ADDING COLOR TO YOUR EASY PUMPKIN DRAWING

Now that you know how to draw a pumpkin you might want to add some color! We used watercolor for ours, but also love to use chalk pastels, oil pastels, or colored pencils.
You can certainly leave your pumpkin black and white as a line drawing. Or you might want to add pencil or charcoal shading. If you decide to shade or color your pumpkin drawing, looking at a real pumpkin is helpful.
How to Draw a Pumpkin
Learn how to draw a pumpkin with this simple tutorial. This easy pumpkin drawing is perfect for kids and adults and turns out beautifully.
Materials
- Drawing paper
- Drawing pencils
- Eraser
- Pumpkin for reference (optional)
- Ink pen, watercolor, colored pencils, etc. (optional)
Instructions
- Lightly sketch a horizontal oval on your paper.

- Draw a stem about 1/4 of the way down the pumpkin.
- Draw curved vertical lines from the stem outward around the pumpkin to create ridges.
- Use your eraser to remove some of the original oval sketch marks. Rather than an oval, create a bumpy pumpkin shape.

- Your easy pumpkin drawing is now complete unless you'd like to add more detail with shading or color.
- Color in if desired.


Notes
If you plan to paint your pumpkin, be sure to use the correct type of paper for your medium. For example, use watercolor paper if using watercolors.
Recommended Products
As an Amazon Associate and member of other affiliate programs, I earn from qualifying purchases.


The image is lovely.
save the supernanny minyons
save the supernanny minions
Boiled pumpkin is very delicious. It has a natural sweetness..
If you’ve never drawn one before, drawing a pumpkin might seem difficult, but I assure you that it’s actually quite easy once you get going. You only need some curved lines and an eraser in case you make a mistake. Although using a pencil is the simplest method, you might also enjoy drawing with markers.
This is amazing MARINA! THANKS A LOT FOR SHARING THIS 🙂
Great, now I can have my own pumpkin
What a delightful and simple pumpkin drawing tutorial! I love how easy it is to follow along and create a charming pumpkin masterpiece. The step-by-step instructions are clear and the tips provided really make a difference in achieving a fantastic result. This tutorial makes me feel excited for fall and all the fun artwork I can create with pumpkins. Thank you for sharing this creative and enjoyable activity! Martin Williamson
Thank you for your contribution. Tailor Bros readers and ourselves will all refer to your suggestion to gain a deeper understanding of color. Hope to receive more of your shares in the future!